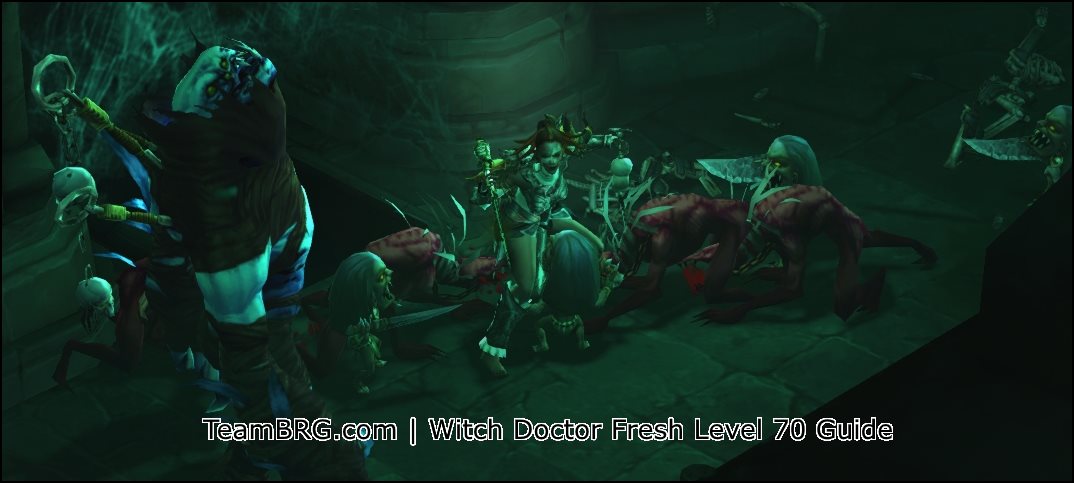
Just got your Witch Doctor to Level 70 Witch Doctor? Now what? Look no further. In this guide, you’ll learn exactly what to do for each step for Seasonal Jounery, Haedrigs Gift, Builds & Items,and ultimately leading to the end-game as your Fresh 70 Witch Doctor.
In Season 23, the Witch Doctor free set is: Helltooth Harness.
Updated Apr 15 2021: Added mentions of Follower Guide where applicable.
Without further ado, let’s get into it.
Fresh 70: The first step – setting up!
The very first step of your journey! Here, I discuss items, rerolls, and basic advice to keep in mind during your ascent.
You have to ALWAYS BE AWARE of how your FOLLOWER can greatly affect farming speed! S23 introduced the “full build” and emanate system – keeping items important for your Follower Farming Build is high priority!
0pc Helltooth free set – getting the 2pc
2pc Helltooth free set – getting the 4pc
4pc Helltooth free set – getting the 6pc
For clarity the next boxes contains builds and info if you currently have 4pcs of the Helltooth free set, going for 6 (you have the first + second Haedrigs gift bag, going for the third). This segment is further divided into three parts – Torment II, Torment IV, and GR20.
Torment II seasonal journey entries
Torment IV seasonal journey entries
4pc Helltooth free set GR20
Fresh 70 Witch Doctor 6pc Helltooth Free Set, onwards
| S23 Fresh 70 WD 6pc Helltooth Free Set Build | |
| Skills | Rune |
| Wall of Death |
Communicating with Spirits
|
| Zombie Charger (Any HT skill) | Zombie Bears |
| Spirit Walk |
Severance / Jaunt
|
| Soul Harvest |
Languish / Soul to Waste
|
| Zombie Dogs |
Leeching Beasts
|
| Gargantuan (Open) | Humongoid |
| Passives | |
| Blood Ritual |
Spiritual Attunemen
|
| Grave Injustice |
Fierce Loyalty (Jungle Fortitude)
|
FROM HERE OUR GOAL IS TO GAIN POWER FAST. The next logical steps are Legendary Gems, and being mindful of the good items you need to find.
Some build notes:
- Zombie Charger – Bears already? Well, it’s really up to you. Almost any of the helltooth spenders work early game.
- No generator? Double mana passives and Grave Injustice should be enough early on to play even without a mana generation skill. You can adjust your build a little if you like.
- Gargantuan? Is actually pretty useless right now. It’s truly an OPEN skill slot. You can add a mana generator or something here, or some utility like Horrify.
- Passives? WD passives are amazing and it’s very very difficult to recommend only four. However, Blood Ritual is super important for all stages of this build (especially when getting Captain Crimson set) – it’s the one you should always have. Grave Injustice is better than it looks, and works in both speed and tryhard scenarios.
- Follower build and items are IMPORTANT!
Keep in mind the important rerolls I mentioned at the start of this guide. Also, before you proceed, here’s a preview / reminder/ of items you need to look for.
Powering Up: Legendary Gems
Your next step after getting your 6pc is Legendary Gems. Why? LGems are a huge power spike relying on very little RNG. Simply spam Neph -> GR until you get the three gems you need and power them up to 25.
Bane of the Powerful: For 25 points you get a “maxed out” gem that’s useful for a LONG TIME, as well as remaining viable for certain content types. Never bad to own an L25 BoP.
Moratorium: Most people would need a defensive gem at this point, and Moratorium also “practically caps” at 25. Can be used for augments later! Alternatively, you can straight up just go Esoteric.
Bane of the Trapped: One of your most powerful gems, and the one you want to level up most (except maybe Stricken once you need it). A basic DPS gem you’re never sad to have a high level one of.
Bane of the Stricken – is the go to LATE GAME DPS Gem of choice. Its main use is shortening your Rift Guardian time (and helping out vs yellow elites).
Esoteric Alteration – is probably the best defensive gem in the game, and is worth having a strong one around.
Boon of the Hoarder – is used in many speedfarming builds alongside Avarice Band.
Again, Legendary Gems are a massive priority given their NON-RNG powerspike. Just having three useful gems at 25 will allow you farm a few torment levels higher.
Powering Up: Important Items & how to get them
Of course, any build will need a couple (or more than a couple) items to round out. Here, I list down what items you’re looking for, and how best to get them using various currencies and means.
Here’s advice on how to spend your blood shards with Kadala, roughly in order of importance.
Bracers – Lakumba’s Ornament: For a much needed defensive boost. Nemesis also drops here, for your follower, which is a great item for better rift clear speeds.
Mojo – Ursua’s Trodden Effigy: Your only other truly core item. Increases damage and QoL for Zombie Bears! There are quite a number of good fillers here too like Ukhapian Serpent and Thing of the Deep.
From here, there’s not much you really want with Blood Shards…
Rings? It’s a long shot, and it’s expensive, but you can get some of your useful rings here. I repeat, this is a long shot! Unity, Compass Rose, Ring of Emptiness – all great finds.
Amulets? Weapons? Don’t bother with shards.
Here’s advice on how to get your weapons from Deaths Breath rare item upgrades, roughly in order of importance.
Ceremonial Knives for Scrimshaw AND Sacred Harvester. Well, having both come from one pile is surely an advantage! Scrimshaw is what you want first. It gives a huge resource discount for Zombies, as well as a near unparalleled 700% bonus damage. Harvester
Mojo – Ursua’s Trodden Effigy: If you’re unlucky with Shards, you can try fishing for your Mojo with DB’s which is a little better.
2h Staff – Wormwood is always nice to have as a speedfarming option when running setups with Ring of Emptiness. Keep in mind Wormwood should only be considered for non-tryhard content.
Rings and Amulets are tough to get from either BS or DB’s (due to the large amount of possible outcomes), but if you’re done getting your core items from them – and you haven’t got your core accessories, it’s a viable way to spend them.
Ring of Royal Grandeur is your priority here, as it allows you to equip Captain Crimson legs and belt. This just gives you so many good stats! RDR, CDR, Damage reduction and increase! Lots of value for “one drop”. This ONLY DROPS from ACT I Bounties.
Ring of Emptiness is a great ring – but it does come with a “tax” of a skill slot, or cubing Wormwood. You can both tryhard and speedfarm with this, with slightly different setups.
Unity is a great defensive option for now, as well. However, you do need a pair.
Compass Rose + Traveler’s Pledge is the accessory set that best suits this build IMO.
Typically you’ll just find these as you grind, as they can be difficult to obtain with currency…
This is just a list of your “all-around” items that may or may not be mentioned previously. While I do not take set-specifics in this tab, it serves as a seasonal reminder (and helpful general list for newbies) on what’s “generally good”.
Reapers Wraps: A Crafted legendary whose plans drop from any Torment Malthael (and is oft mentioned in our Fresh 70 guides), any NON-RNG boost to power (in this case, resource generation) is welcome. MOST builds can benefit from an early reapers.
Nemesis Bracers: An absolute monster for increasing rift clear speed (and a little extra deaths breaths!), newer players might not value this as highly – try it out and you’ll be surprised.
Unity: Used alongside another Unity on your follower (Plus their unique “Cannot Die” relic) essentially halving all damage you take for one ring slot, that’s usable for any character. Not bad.
Obisidian Ring of the Zodiac: Core on many builds, but usable for any build that spends resource. It’s a unique source of “in-combat” CDR that would give you 100% uptime on skills you couldn’t otherwise achieve. It’s pretty crazy.
Focus+Restraint: If you can trigger both halves of the set bonus, and don’t mind losing defenses from rings – this is will “more than double” your DPS.
Travellers Pledge + Compass Rose: Another accessory set, this one is more suited for “elite killer” builds that like to travel in between packs, and face-tanking builds that tend to stay still while DPSing. It’s not very universal, but it can reasonably benefit any character.
Convention of Elements: Literally any character can use this ring. It’s a titanic boost in DPS (especially for builds that have tons of short-duration buffs… LINE THEM UP!).
Ring of Royal Grandeur: -1 set item requirements to help you fit random core or filler legendaries to help your build out. While absolutely necessary on some builds, most builds can benefit from this using “generic” legendaries for a temporary power boost (IE Aquilla Cuirass).
Avarice Band + Boon of the Hoarder (+Goldwrap) the gold farming speedy holy trinity. While you don’t really need all three all the time, this combo allows you to speed through and survive ANY difficulty (careful, this doesn’t improve DPS!).
You also need specific items for your follower build, which again, has a huge impact on your farming speed.
Helltooth 6 Full Build Template Preview
| S23 Fresh L70 Witch Doctor Helltooth 6pc full build template | ||||
| Head | Helltooth | Skill | Rune | |
| Shoulder | Helltooth | Wall of Death |
Communicating with Spirits
|
|
| Chest | Helltooth | Zombie Charger (Any HT skill) | Zombie Bears | |
| Arms | Helltooth | Spirit Walk |
Severance / Jaunt
|
|
| Legs | Cpt Crimsons | Soul Harvest |
Languish / Soul to Waste
|
|
| Boots | Helltooth | Zombie Dogs |
Leeching Beasts
|
|
| Belt | Cpt Crimsons | Gargantuan (Open) | Humongoid | |
| Bracer |
Lakumba’s Ornament
|
Passives | ||
| Amulet |
Traveler’s Pledge (Squirt)
|
Blood Ritual | ||
| Ring | Compass Rose | Grave Injustice | ||
| Ring |
Unity (Emptiness)
|
Jungle Fortitude (Open) | ||
| Weapon | Scrimshaw | Fierce Loyalty (Open) | ||
| Offhand |
Ursua’s Trodden Effigy
|
— | ||
| Kanai’s Cube | Legendary Gems | |||
| Sacred Harvester / Wormwood | Bane of the Powerful | |||
| Aquila Cruiass (Semi open) | Bane of the Trapped | |||
| Ring of Royal Grandeur | (OPEN) Esoteric, Hoarder, Stricken etc | |||
The above is the baseline template for a fully functional 6pc Helltooth. It’s not heavily optimized for pushing GR, but more of a speedy farming slant. It’s a great place to be in, as you adjust the build to your needs!
Some notes:
- Ring of Emptiness is solid for DPS, but you need to add Locust Swarm to your build (removing Gargs which is fine), or thru adding Wormwood in the cube (speedfarming).
- Wormwood should only be considered for non-tryhard farming.
- Many viable LGems depending on the content. Trapped will always be there, Stricken for high tier GR, Powerful for nephs… If you go for Squirt, you might want Wildebeest.
- Passives are pretty lose, but Blood Ritual should always be there if you’re using Captain Crimson as it counts towards Reduced Resource cost!
Bridging to the End-Game
!! Some of these links are not updated for S23 !!
But will serve as a valud data point in the meantime.
(Want to add a non-Mundunugu speedfarm build, Helltooth bears is legit)
So you skipped a whole chunk of the powering up phase with the free set. Now what? Like I always say, “Speedfarming first before pushing GR’s”. So, convert what you have NOW to be as speedfarmy as possible, first.
It’s highly likely you’ll transition into a PURE speedfarming build. If so, check out:
Witch Doctor Best Speedfarming Build (Still being updated for S21)
- Newer WD? Check out these speedfarming resources:
Other Witch Doctor Guides:
- Witch Doctor Leveling
- Raiment of the Jade Harvester | Jade Harvester Set Dungeon
- Helltooth Harness | Helltooth Set Dungeon
- Spirit of Arachyr | Arachyr Set Dungeon
- Zunimassa’s Haunt | Zunimassa’s Set Dungeon
Check out our D3 Guide Directory for other resources.
 S28 | 2.7.5")
 S28 | 2.7.5")
 S28 | 2.7.5")
 S28 | 2.7.5")
 S28 | 2.7.5")


 S28 | 2.7.5")
 S28 | 2.7.5")
 S28 | 2.7.5")
 | 2.7.5")


Also when is a good time to start replacing the season set? Like how much of an increase should the item be before I swap it in to replace a piece of the seasonal set?
What are your thoughts on the ancient legendary pig sticker? I got one with cdr skills 6%/reaource cost 10%/dmg to beasts 19%/dmg to humans 26%.
Pig sticker isn’t typically used by Witch Doctor. Sacred Harvester is a better all-purpose 1hander. It gets pretty insane once you augment it. But if you feel like it’s well rolled, save it.
Right after I posted about pig sticker I got the wormwood lol. That staff is so good I HAD to unequip it to complete the set dungeon. It would kill everything before I could do anything lol. Its gonna be hard to let this staff go.
Brilliant guide! Perfect and exactly what I needed for the new ladder.
Only suggestion would be advice to slowly transition into what looks like the most powerful build this season, which seems to be Jade Harvester.
I am using Z6 and have tried to follow this guide as closely as possible but I just can’t seem to get my fetishes up past 8. I am using haunt and I spam it liberally and move around and stuff. I tried acid rain but it just doesn’t work for me that well because it is not fire and forget like haunt (targeting issues) and I run out of mana so quickly and then stand there twiddling my thumbs. So not sure what I am missing because I am trying different things but since my gems got to 25 I can’t get past GR40 (T7) in time and that feels like I am behind the curve.
Advice? Suggestions? Appreciation in advance and thanx for the bitchin’ guide 🙂
last time I played diablo 3 was at the auction house disaster.Now I am back,taking a break from overwatch and the game completely change,without thinking about my build its already enormous,You helped me a lot and I really appreciate the time and effort you put on this.
Thank you very much
Thank you for your kind words! It’s what these guides are made for good sir!
Am I using acid cloud wrong if I am not getting Fetishes up to the passive max? I can do it easily with haunt but that is also much easier to spam.
Love yalls guides btw, third season using them and it is always great.
You’re absolutely correct and that’s why I mentioned both of those skills. Fetishes are much easier to gather with Haunt compared to Acid Rain. But alas, the Haunt coverage is pretty bad. Honestly there’s no way around suffering usability issues of Z6 early on.
What do you mean when you say Belt of Trans works along Fetish Sycophant? Is it that you get Fetishes up faster?
Yes, you get them up faster. Also, in the eventual Darts build keep in mind that the belt only triggers off SPENDERS. The Passive works with all attacks. It can be suboptimal to have them both, but in the early game – them working in tandem can be a load off your mind.
are you going to update this for Season 10 set ?
updated it last tues.
Ok nervermind, i send a post before but because I didnt know how the Kunai’s Cube works. Now I do (didnt play for a long time).
I have a doubt.
I just got the set of 6 free pc, but, before completing the set, I got the Quetzalcoatl, so it’s worth losing the 6 bonus level?
Thank you so much for this guidea. It helped me out a ton. I am new to seasonal and Diablo 3. I am confused when you say ‘GR 38 is enough to 25 a gem.’ Does that mean I need to get to GR38 to get a gem up to 25? Thanks again.
we’re glad we’re able to help you! 🙂 GR38 is enough to level a gem up to 25 with 100% success rate
what about paragon points?
hi! its just the basic paragon priorities.
Core – Primary stat > Vit > Move speed (depends, 25 points at most) > Max Resource (optional). all other points will be placed in primary
Offense – CHC > CHD > CDR > Attack Speed
Defense – Res All > Life > Armor > Life Regen
Utility – Area Damage > RCR > LoH > Gold Find
This needs updating for S8
yes sir… we are working on it! will post once its ready
Thanks for this awesome guide! Followed it with super success! Awesome looking forward to see more like this!
wow thats insane! Best guide ever found sofar! GJ !!
Which gems should you level ASAP? You list Zei’s, Powerful, and Trapped but only talk about Trapped and Enforcer which isn’t listed.
Oh ZEIS??? That’s a typo! Leave powerful @ 25 (level sparingly), dump points into Enforcer and Trapped. FIXED LGEM SECTION
So what do I do once Ive followed the above? Unless im missing something here all you do is talk about build and playstyle?
You can now start farming for items (getting ancient legendaries, death’s breath, materials for kanai-ing). Long term goals are up to you really. You can aim to climb the WD leaderboard, complete the season journey (shift+J) to get stash tab/s or just complete achievements (Y). It depends on you.
This guide is to help you somehow beef up your fresh 70 witch doctor, with or without the free set, so you could go clear higher torments asap. Once you’ve completed the above, you can even try other Witch doctor set builds or classes.
I can’t get any set pieces to drop from Izual in Torment 2. Is it just luck and RNG?
Is this your first class that you played this season? If yes, you should get the 2nd free set in your mailbox right after you kill Izual.
In the build you said ” I see it as unnecessary” where you talking about the ‘Locust Swarm’ or the ‘Corpse Spiders’ skill?
Technically both are lol. Use Spiders if you have mana problem and Locust Swarm or any other if you don’t.