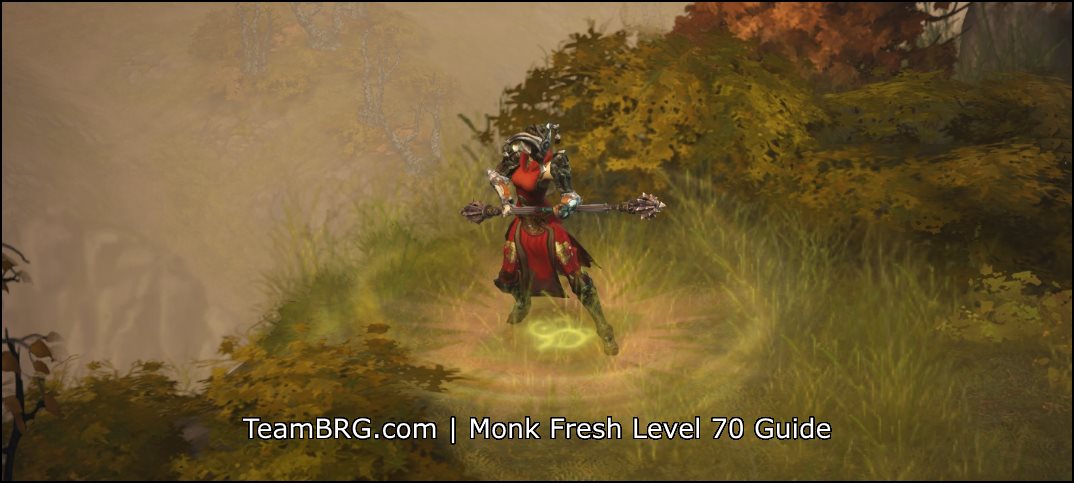
Here we are again! If you’re a Fresh L70 Monk and wondering where to go – look no further. Seriously. Here, we teach you what to do step by step until you reach your free seasonal 6 piece set.
In Season 22 the Monk free set is: Patterns of Justice.
Season 22 and YOU. How does it affect?
Well, let’s not beat around the bush. The fourth Kanai’s Cube slot is the ultimate buff here. Sure, the Pylons spawning a certain kind of “shadow clone” is cool and exciting in its own way… But when it comes to pure POWER, a fourth Kanai’s slot is probably the strongest ever buff we’ve had!
It doesn’t really help early on, but as you gather more and more legendary effects, it will help you out quite a bit. In the end-game, this is, at the very least, a 20/30% power spike to your character.
Without further ado, let’s get into it.
Fresh 70: The First Step – Setting Up!
The very first step of your journey! Here, I discuss items, rerolls, and basic advice to keep in mind during your ascent.
Yellow items - stats - rerolls - gems
REROLLING YELLOW ITEMS IS SUPER LEGIT, CHEAP, AND UNDERRATED.
Nicely rerolled yellows will carry you for a LONG TIME.
Craft a Reaper’s Wraps if you can. While this build can definitely manage without it, if you have the materials on hand, why not? It will help you out until you get the 4pc bonus, at least.
WEAPON: Craft or find a 2H Mace. The stats you want are DEX VIT LpH or Socket (Purple gem for LpH, Red for DMG+, Green for CHD+). Avoid any other stat for now.
Monk is an DEX Class – meaning you get free ARMOR from all the DEX on your gear. This results in a huge lack of ALL RESISTS. So, in your reroll strategy REMOVE ALL ARMOR ROLLS as they’re pretty much USELESS – and replace them with ALL RESISTS. ALLRES is your best defensive stat by a LARGE MARGIN. Socketing Diamonds also gives you ALLRES.
SELF HEALING: Life per Hit is super important for your early game survival. Life per Spirit spent is also “ok”, but quite difficult to roll on your gear (Only appearing on Fists, Daibo, and Spirit Stones – and not very high). Having either or a combination of these is pretty much required early on.
Elemental% can be found on Bracers and Amulets. You ideally want it on both. Cold% is what you’re after. While you may not necessarily use Cold skills earlier on, you will end up there. There’s no need to roll a “temporary” element since the journey isn’t so bad.
Skill% (Tempest Rush%) can be found on Boots and Helm. Typically, it’s safer and easier to roll this on boots. While there’s all sorts of damage going on with this build, avoid rolling damage% on these “subsidiary” skills – it’s not worth it.
Chest / Legs: DEX VIT ALLRES Sockets (3/2). Life% isn’t bad either. Since you typically get these pieces last, you’ll want decent fillers until you get your 6pc set.
Belt: Is a huge source of defense. DEX > VIT > RES > Life%. You’ll be surprised how a single item can give you a whole load of toughness.
Rings and Amulet: You NEED sockets on these to prep for legendary gems. Get any stat on these that you feel you’re missing. Feeling soft? Get defenses. Need DPS? Crit and mainstat. Feel free to roll “random helpful stats” on these for now, instead of the usual endgame CHC/CHD/MAINSTAT.
GEMS: For body pieces you’ll want Diamonds for ALLRES. Helm may vary (Amethyst for Life%, Topaz for resource cost reduction, Diamond for Cooldown Reduction) depending on your needs. On the topic of helmet gems – Topaz is a good idea until you get the 4pc, then switch to Amethyst or Diamond.
OTHER SLOTS will be taken over by your free set pieces. No matter how bad they are stat wise, the 4pc bonus will heavily outperform any temporary yellow you can make.
Getting the “correct” stats beats getting the “perfect” stats for now. REMOVE USELESS STATS and get any USEFUL STAT for massive gains in power.
Remove useless stats
- Life Regeneration – garbage.
- Attack Speed – it usually is an endgame tune-up stat.
- Excessive Resource Cost Reduction – Is a crutch, and only niche builds need it.
- Excessive Cooldown Reduction – Only useful for an endgame “need”.
- Armor – Useless for us, take ALLRES instead.
- Unused skill% – literally has NO EFFECT.
Take better stats
- DEX VIT – can’t go wrong with these. Your core stats!
- ALLRES Life% – Great defensive stats.
- Life per Hit – Great early game sustainability.
- CRIT Stats (CHC / CHD) – More for endgame, but I’d take this over garbage stats.
Don’t forget to bring out Templar with you. The free healing and resource gained from him is a big help! A pet, too, to pick up all those coins to upgrade all the NPCs in town.
0pc Justice Free Set – Getting the 2pc
Getting 1st Haedrig's Gift
For clarity, this box contains info and builds if you currently have 0 pcs of the Justice free set, going for 2 (you don’t have any Haedrig’s gift bag, going for the first).
| Monk Fresh 70 No Set Build |
| Skill |
Rune |
| Crippling Wave |
Mangle |
| Wave of Light |
Explosive Light / Pillar of the Ancients
|
| Mystic Ally |
Air Ally |
| Dashing Strike |
Way of the Falling Star / Blinding Speed
|
| Sweeping Wind |
Inner Storm |
| Mantra of Healing (Open) |
|
| Passives |
| Mythic Rhythm |
|
| Exalted Soul |
Seize the Initiative |
A very basic build that’s easy to edit if you have game-breaking legendary effects. It’s a straight-forward Wave of Light spirit regeneration build. Should be more than enough for your immediate needs! ABUSE MYTHIC RHYTHM.
If you have a powerful legendary – edit the build to accommodate it if needed.
*Pressing Shift+J (PC) opens up your Seasonal Journey tracker!*
The entries in these early chapters are dead easy. The build above gives you a good balance of offense, defense, and speed built in to help you breeze through this as mindlessly as possible.
Hard Mode on for Chapters 1 & 2. Clear through all the entries on Hard. Just up the difficulty to complete one Neph on Expert.
Don’t forget to level up all the NPCs in town. Completing your weekly Challenge Rift will help you get resources to do this easily, if you haven’t already.
When you’re done here, get your first free set from your mail, and proceed onward.
2pc Justice Free Set – Getting the 4pc
Getting 2nd Haedrig's Gift
For clarity, this box contains builds and info if you currently have 2 pcs of the Justice free set, going for 4 (you have the first Haedrig’s gift bag, going for the second).
| S22 Fresh 70 Monk 2pc Justice |
| Skill |
Rune |
| Crippling Wave |
Mangle |
| Wave of Light |
Explosive Light / Pillar of the Ancients
|
| Mystic Ally |
Air Ally |
| Dashing Strike |
Way of the Falling Star / Blinding Speed
|
| Sweeping Wind |
Any (All Active) |
| Mantra of Healing (Open) |
|
| Passives |
| Mythic Rhythm |
|
| Exalted Soul |
|
The 2pc bonus is centered on sweeping wind, and gives us a bunch of free damage. It may be a little jarring to keep it up in a low-power, low-density, low-mobility environment but it is what it is. Nothing huge… just get a little faster, and get some passive DPS…
If you have a powerful legendary – edit the build to accomodate it if needed.
*Pressing Shift+J (PC) opens up your Seasonal Journey tracker!*
Difficulty: Although there are entries here that need to be finished on Master, you can still complete the bounty cache, if you haven’t already, on Hard. For the bounty, try to do the whole five acts as you’ll need to do this down the line anyway.
These entries are still on the easy side, so we can be a little lax with our build making as little sacrifices as possible to retain good DPS, Speed and some thought to defense. When you’re done with this chapter, collect your 2nd set of free set and let’s finish the next chapter for the remaining free gear!
4pc Justice free set – getting the 6pc
For clarity the next boxes contains builds and info if you currently have 4pcs of the Justice free set, going for 6 (you have the first+second Haedrig’s gift bag, going for the third). This segment is further divided into three parts – Torment II, Torment IV, and GR20.
Torment II seasonal journey entries
Torment I-II and general stuff
| S22 Fresh 70 Monk 4pc Justice |
| Skill |
Rune |
| (Open) Blinding Flash |
Faith in the Light (Crippling Light)
|
| Tempest Rush |
|
| Mystic Ally |
|
| Dashing Strike |
Way of the Falling Star / Blinding Speed
|
| Sweeping Wind |
Any (All Active) |
| Mantra of Salvation (Conviction) |
|
| Passives |
| Sixth Sense |
Resolve |
| Transcendence (Momentum) |
|
SIGNIFICANT BUILD CHANGES. The 4pc bonus is pretty silly. It gives us much needed defense, and a very welcome amount of Spirit regen. This allows us to drop all Spirit crutches from our build in lieu of more DPS, toughness, and mobility. Since Tempest Rush is essentially “free”, it’s now our primary spender.
This build will be the baseline for all entries in this tier (Torment II, IV, and GR20). While this build may seem overkill for the Torment II entries, you may as well prep up for the harder parts of this tier.
Upgrade a Rare to Legendary w/ Kanai’s Cube: 1H fist weapon for Won Khim Lau.
Complete a Torment I Rift: This will be the minimum level you should be farming at should you need to do it. Increase if you can easily obliterate a rift. There’s also a “Kill a Torment II Boss” entry here which should be easy.
Complete any other odds and ends that you can before proceeding to Torment IV.
Torment IV seasonal journey entries
Torment IV Stuff
Build template in the Torment II tab.
While not exactly chewing through enemies, you do have quite a bit of firepower and defense. However, if you neglected fixing up your yellows you’re gonna feel it. Cold% and Tempest Rush% become really important so try and get them.
In Torment IV things get real. For many of the free sets, this place is the breakpoint wether your build needs help or not. And for S22 and Justice is not too bad.
- Kill Odeg – Keywarden in ACT I, Fields of Misery.
- Kill Sokahr – Keywarden in ACT II, Dahlgur Oasis.
- Kill Xah’Rith – Keywarden in ACT III, Stonefort.
- Kill Nekarat – Keywarden in ACT IV, Gardens of Hope 2nd Tier.
- Kill Specific Boss – Check your journal to see who it is this season.
- Keywardens maps have a key icon next to the waypoint. Purple arrows point you to their location after a short while once you’re in their respective map.
For the boss and all Keywardens – STRAIGHT UP RUSH TO THEM!
Ignore ALL TRASH and just beeline! Get it done ASAP!
You’ll really notice if you’ve neglected your temporary yellow gear and rerolls. Hopefully, you have powerful legendary to carry you (and even if you do), you will notice if you’ve neglected your gear. Refer to the very top setting up tab if you need help.
Either way, this is a good time to take a closer look at your items and get as many powerups and rerolls stated in the setting up tab above.
4pc Justice free set GR20
GR20 Stuff
Build template in the Torment II tab.
Simple changes in skills, passives, and runes if you need more DPS or more toughness. The Torment IV entries up to this point should clue you in. The base build template doesn’t change.
This isn’t so bad. You just need a good mix of survival and DPS. The Torment IV entries leading up to this point should give you an idea of how you’ll fare.
You’re mainly going to be in the thick of things to deal damage. Sweeping Wind and Tempest Rush tend to do that… Flurry is a huge part of your DPS and use it to pop elites (something you’ll get used to down the line).
You’re gonna need quite a bit of LpH, which is great for the build anyway – so make sure you have it going forward.
Adjust your build if you think you need more DPS / Toughness. Usually a few Passive changes and/or Fire Ally / Mantra change does the trick.
You should have an idea of how strong you are given the drops (or lack thereof) you’ve gotten. Be practical and don’t be afraid to shore up your build a little. If you feel a little weak – Do 4 quick Nephs, then do 4 GR10+.
The “ultimate” challenge gating you to getting your full six piece free set! The difficulty varies wildly on your class and seasonal set. As someone who has cleared with EVERY SINGLE SET AND CLASS WITHOUT ANY OTHER LEGENDARY – let me tell you, they’re not all created equal.
Fresh 70 Monk 6pc Justice
| S22 Fresh 70 Monk 6pc Justice |
| Skill |
Rune |
| (Open) Blinding Flash |
Faith in the Light / Crippling Light
|
| Tempest Rush |
Flurry |
| Mystic Ally (Epiphany) |
Earth Ally (Desert Shroud)
|
| Dashing Strike |
Way of the Falling Star / Blinding Speed
|
| Sweeping Wind |
Any (All Active) |
| Mantra of Salvation (Conviction) |
|
| Passives |
| Sixth Sense |
Resolve |
| Transcendence (Momentum) |
|
Well, we’re finally here! In the basic build we’re going to stack as much defense as we can, as toughness will be your gate moving forward (and will rise more slowly compared to your DPS as you get items). Feel free to adjust the build (switching up passives or LGems) for more DPS if you need it.
FROM HERE OUR GOAL IS TO GAIN POWER FAST. The next logical steps are Legendary Gems, and being mindful of the good items you need to find.
Keep in mind the important rerolls I mentioned at the start of this guide. Also, before you proceed, here’s a preview / reminder/ of items you need to look for.
Core items preview - look out for these!
| Item Slot |
Item Name |
Priority? |
| Fist |
Won Khim Lau |
Core |
| Daibo |
Balance |
Core |
| Bracer |
Cesar’s Memento |
Core |
| Ring |
Obsidian Ring of the Zodiac |
|
| Ring |
Ring of Royal Grandeur |
High |
| Belt |
Cpt Crimson Belt |
Need RoRG |
| Legs |
Cpt Crimson Legs |
Need RoRG |
| Belt |
Kyoshiro’s Soul |
Optional |
As implied, these are the items that are core, or important, to your build. I talk more about how to obtain these later on – remember to keep these in mind always.
At the very bottom of this guide, you can preview what a good base template build is for items / skills / passives to get an idea what you’re going for.
Powering Up: Legendary Gems
Your next step after getting your 6pc is Legendary Gems. Why? LGems are a huge power spike relying on very little RNG. Simply spam Neph -> GR until you get the three gems you need and power them up to 25.
Justice Main useful gemsOther useful gems
Taeguk is your godly gem. Fully stacked, it outperforms most gems DPS – WHILE giving you a defense boost! This should be your highest leveled gem.
Moratorium and / or Esoteric Alteration – You’re going to want one of these (or maybe even both) early on. I can’t really say what you should do, but honestly… Getting Moratorium for the early game feels really good. You can just augment it later on.
My advice is to go double defensive gems for now.
But, if you’re in the market for other DPS gems early on…
Bane of the Powerful is a low cost (L25 only) gem that you’ll never feel bad to own. Bane of the Trapped is a DPS gem that requires a lot of investment but will outperform Powerful, eventually.
Note that any of these early game fillers can be leveled to 50 then turned into augments!
Bane of the Stricken – is the go to LATE GAME DPS Gem of choice. Its main use is shortening your Rift Guardian time (and helping out vs yellow elites).
Esoteric Alteration – is probably the best defensive gem in the game, and is worth having a strong one around.
Boon of the Hoarder – is used in many speedfarming builds alongside Avarice Band.
Again, Legendary Gems are a massive priority given their NON-RNG powerspike. Just having three useful gems at 25 will allow you farm a few torment levels higher.
Powering Up: Important Items & How to Get Them
Of course, any build will need a couple (or more than a couple) of items to round out. Here, I list down what items you’re looking for and how best to get them using various currencies and means.
Core items preview - look out for these!
| Item Slot |
Item Name |
Priority? |
| Fist |
Won Khim Lau |
Core |
| Daibo |
Balance |
Core |
| Bracer |
Cesar’s Memento |
Core |
| Ring |
Obsidian Ring of the Zodiac |
|
| Ring |
Ring of Royal Grandeur |
High |
| Belt |
Cpt Crimson Belt |
Need RoRG |
| Legs |
Cpt Crimson Legs |
Need RoRG |
| Belt |
Kyoshiro’s Soul |
Optional |
As implied, these are the items that are core, or important, to your build. I talk more about how to obtain these later on – remember to keep these in mind always.
At the very bottom of this guide, you can preview what a good base template build is for items / skills / passives to get an idea what you’re going for.
Blood ShardsDeath's BreathRings and AmuletsThe Classics
Here’s advice on how to spend your blood shards with Kadala, roughly in order of importance.
Bracers for Cesar’s Memento. While swingy AF, it does provide extreme burst if you use it well. Time your CC with Flurry – that’s core to your tryhard setup.
The above is literally the ONLY true core item
for your build you can find from Blood Shards.
Shoulders – Mantle of Channeling, Lefebvre’s Soliloquy. One of these will find its way into your build. Both of them are defensive, Soliloquy much more so.
Bracer also gives Nemesis Bracer. Increasing Rift clear speeds is always welcome. Newer players who might not realize how good this is – try it out.
Belt for Kyoshiro’s Soul: this is just a lazy way to keep your Sweeping Wind up. It’s purely a small QoL item that shouldn’t be in your serious setups.
I can’t really think of anything that’s even remotely as useful as these. Everything else remains low-tier filler. Aquila Cuirass works most of the time, depending on your setup.
Here’s advice on how to get your weapons from Death’s Breath rare item upgrades, roughly in order of importance.
1h Fist for Won Khim Lau. It causes your Tempest Rush to trigger Cyclone Strike automatically – and boosts both their damage to absurd heights. This is why you see Cyclone Strike in these builds. There’s lots of other great drops here, too – the toughness boosting Crystal Fist, and speedfarming option Vengeful Wind.
Daibo for Balance. A generic DPS increase for Tempest Rush that boosts your critical hit rate to 100% when in “single target” scenarios! If you’re wondering why I list this second, Won Khim Lau is a far greater DPS boost.
As long as both WKL and Balance are active, it doesn’t matter what’s in the cube or not. If you’re cubing Balance – then that gives you one more free slot for a utility fist (likely better in the END-GAME, pretty irrelevant right now).
Rings and Amulets are tough to get from either BS or DB’s (due to the large amount of possible outcomes), but if you’re done getting your core items from them – and you haven’t got your core accessories, it’s a viable way to spend them.
Convention of Elements is hilariously effective in this build. You time your Flurry explosion with the Ice rotation of CoE + any CC to trigger Cesar’s. It’s a pretty fun “minigame” that has shocking results.
Obsidian Ring of the Zodiac is considered key in this build purely to keep a pseudo 100% uptime on Desert Shroud – Epiphany. While the damage reduction is certainly welcome, the CC immunity is really what you’re after.
Unity is the next best thing, giving a flat increase in toughness. A little difficult since you need two pieces, and the immortal follower relic. Can’t say no to a brainless 50% increase in EHP.
Justice doesn’t really want to use any of the accessory sets, so that gives you freedom to use the “best of the best” rings.
For Amulets, there’s really nothing important. Any (and I mean ANY) WELL ROLLED amulet with, for example, Cold% CHC CHD SOCKET will work. Of course, if you can get a godlike Flavor of Time or Hellfire… but you know how that goes.
Typically, you’ll just find these as you grind, as they can be difficult to obtain with currency…
This is just a list of your “all-around” items that may or may not be mentioned previously. While I do not take set-specifics in this tab, it serves as a seasonal reminder (and helpful general list for newbies) on what’s “generally good”.
Reaper’s Wraps: A Crafted legendary whose plans drop from any Torment Malthael (and is oft mentioned in our Fresh 70 guides), any NON-RNG boost to power (in this case, resource generation) is welcome. MOST builds can benefit from an early reapers.
Nemesis Bracers: An absolute monster for increasing rift clear speed (and a little extra death’s breaths!), newer players might not value this as highly – try it out and you’ll be surprised.
Unity: Used alongside another Unity on your follower (Plus their unique “Cannot Die” relic) essentially halving all damage you take for one ring slot, that’s usable for any character. Not bad.
Obsidian Ring of the Zodiac: Core on many builds, but usable for any build that spends resource. It’s a unique source of “in-combat” CDR that would give you 100% uptime on skills you couldn’t otherwise achieve. It’s pretty crazy.
Focus+Restraint: If you can trigger both halves of the set bonus, and don’t mind losing defenses from rings – this is will “more than double” your DPS.
Traveller’s Pledge + Compass Rose: Another accessory set, this one is more suited for “elite killer” builds that like to travel in between packs, and face-tanking builds that tend to stay still while DPSing. It’s not very universal, but it can reasonably benefit any character.
Convention of Elements: Literally, any character can use this ring. It’s a titanic boost in DPS (especially for builds that have tons of short-duration buffs… LINE THEM UP!).
Ring of Royal Grandeur: -1 set item requirements to help you fit random core or filler legendaries to help your build out. While absolutely necessary on some builds, most builds can benefit from this using “generic” legendaries for a temporary power boost (IE Aquila Cuirass).
Avarice Band + Boon of the Hoarder (+Goldwrap) the gold farming speedy holy trinity. While you don’t really need all three all the time, this combo allows you to speed through and survive ANY difficulty (careful, this doesn’t improve DPS!).
Justice Full Build Template Preview
to follow…
The above is the baseline template for a fully functional 6pc Justice. It’s not heavily optimized for pushing GR, but more of a speedy farming slant. It’s a great place to be in, as you adjust the build to your needs!
Season 22: Justice Fourth cube slot?
Fourth cube slot can be any of the following…
Balance + Won Khim Lau + Flying Dragon is going to be nuts. Triple weapons. Honestly, playing with the weapons is likely to have the highest returns here (even if just placing a Furnace in there).
Mantle of Channeling + Lefebvre’s Soliloquy without needing RoRG is pretty sweet. Sometimes you just want more defense and this is it.
Bridging to the End-game
So you skipped a whole chunk of the powering up phase with the free set. Now what? Like I always say, “Speedfarming first before pushing GR’s”. So, convert what you have NOW to be as speedfarmy as possible, first.
It’s highly likely you’ll transition into a PURE speedfarming build. If so, check out:
Monk Best Speedfarming Builds
Other Monk Guides:
Check out our D3 Guide Directory for other resources.
Support TeamBRG! Check out our Patreon!


 | 2.7.5")

i cant find anymore the section where we clicked to know what best items to gamble with blood shards
also missing “the part where you say best build 2 piece uliana, 4pc uliana” i know u suggest LoD but when we dont have it yet?
No getting of Ulliana – skipping it completely for LoD centric build!
A bug caused it to be hidden! FIXED!
hello, this is my first season and this helped greatly. It took me the three day weekend, but I made like paragon 50 and have the full set. I see the paragon recommendation in the comments. thanks again.
So how do you get all mantras active from the raiment of thunder 2 piece bonus? What am i missing here.
All Mantras active is part of the Inna 4pc set bonus – what line in the guide gave the confusion wherein it comes from Raiment 2?
You say lvl 31 monk for Cindercoat shard-gambling for D3Planner says it’s lvl 34, which one of you is right? 🙂
its 34 now :)will edit this
Thanks for the guide, just started supporting you guys on Patreon since I’ve been using your guides for the last few seasons.
Do you have paragon point recommendations? I only saw the small bit in the section on beating GR20.
Thanks!
Oh wow! Thanks so much! Paragon Priorities are as follows for a basic fresh 70 monk using Uliana:
MS > DEX > Spirit optional > VIT
CDR > CHC > CHD > AS
ALLRES > Life > Armor > Regen
AD > LPF > RCR > GF
This guide has been a huge help for me as a new player. Got my free set and the increase in power is real.
Glad it helped!!!!
Great guide as usual, but missing reroll priorities for items.
Thanks a lot for the guide, I killed T4 Belial without many problems(and without doing the GR20 or good sockets). If anyone needs, the paragons and the skills were the same as the guide suggests, except for one swap, which is Cyclone Strike(with the Soothing Breeze run) for Sweeping Wind.
Here you have the setup I used for it: http://imgur.com/a/op0bY
Really awesome content on this website. Was wondering why fill a skill slot with a mantra, while wearing 4 pieces of inna’s? the set bonus already gives every mantra, epiphany desert shroud seems like a solid skill to use instead
The rune effects sometimes trump epiphany desert shroud in the early game (i value consistency) however you are right that it IS a valid evolution for the “open slot”
Active effects. When you activate your Mantra with Inna’s, ALL mantra actives go off.
In the recent guide for season 9, you list one of the requirements for getting the 6 pc as having to kill Ghom on T1. The achievement requires T2.
Hi Dave! what particular guide did you see it in? as per our Monk fresh 70, it says set difficulty to T2: beat Ghom. 🙂
you missed out the skills table for after GR20. fresh 70 6pcs build
Haha, damn. Posting this now.
Is there a good R6 grooup grift build? Was running with a Wiz & WD and they do a lot more damage than I seem able to do.
Kanai Cube bonuses breakdown?
Blood Shard section gives a good idea. Depth Diggers is best, and everything else is tiny in comparison. Magefist… I’ts difficult to have a useful body slot. Spirit Guards/Nemesis. Ring? RoRG > Rue Chambers… CoE. Weapon is Flying Dragon best > Crystal Fist? In-geom? Raiments strength is so narrow (Basic attacks) that options improving on it aren’t that vast.
I’m on GR40 now and cubed Crystal Fist is very good actually, cuz we’re dashing every 6 sec anyway and Raiment (you said it) are low-def set. Some hits couldn’t be covered with LoH even with Flying Dragon proc, so -50% dmg received is great. Just a thought.
No doubts about Diggers and RoRG, bis.
When I’m supposed to switch to Shenlongs? Non-ancient 2h legendary mace gives like 676k dps when Shenlongs 580k, but “in the field” I’d say the fists shows more stable results even with weaker emeralds in both.
Shenlongs gives an otherworldly DPS increase… youll unerstand once you try it. My only advice is switching once you have the “full build” including the Lefebres rorg diggers.
I’m a total noob in monks but this guide has helped me greatly. Just to let you know guys, this work is appreciated, thank you very much!
For your Inna’s 4 set clear GR20 build I think there is an error.
You have the build with Crippling Wave: Mangle but then you say to try to stack Assimilation as much as you can. Which is it?
Thanks for pointing this out! It used to be Way of Hundred-Assimilation. Both are viable actually but Crippling is more stable. Fixing it!